Development of the FR I was based on the best traits of earlier Contax RTS and Yashica FR models. This, of course, includes the 'feather-touch' electronic shutter system.
The FR I is a manual-focus SLR film camera with dual exposure modes - manual or automatic, is fitted with an electronically-operated, horizontal-travel, cloth focal-plane shutter operating at an automatic speed control from 4 - 1/1000 sec. and manual speed setting from 1 - 1/1000 sec., B, flash synchro, and a 7-second delay self-timer.
The camera accepts film ISO speeds ranging from 12 - 3200, with exposure compensation at +- 2EV. Though the body is firm and a delight to work with, the FR I is physically not as robust as its RTS counterparts.
Seen with clean lines, and aside from the aforementioned electronic shutter system, the camera has a very bright, clear, and easy-to-read full information viewfinder, which comes with a diagonal split-image center spot with a microprism collar, and a unique metering display option, both of which you might have to take some time to get used to.
A strong feature of the camera is the Contax/Yashica lens mount system, which allows the camera to be fitted with a wide range of Carl Zeiss T* lenses, as well as the highly regarded Yashica ML series lenses, which were the standard for this camera, and lower-priced Yashica DBS and YUS (Yashica US) series lenses.
The camera can also be fitted with a power winder, Contax motor drive, and infrared remote shutter release.
Basic Camera Features
A point of note on the operation of the camera is that while the meter is always on, the metering display is not. In Auto exposure mode, the shutter speed will be released at the shutter speed metered, while in Metered Manual mode, the shutter will be released at the stepped speed set on the dial.
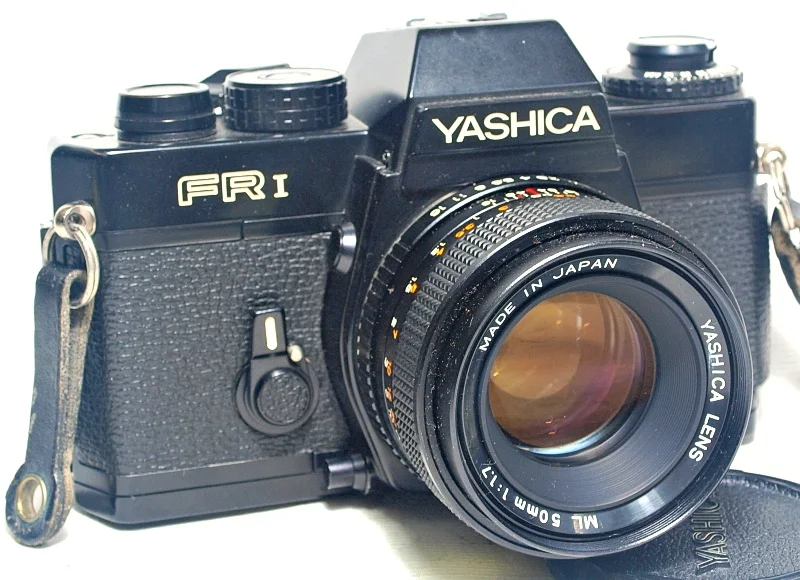
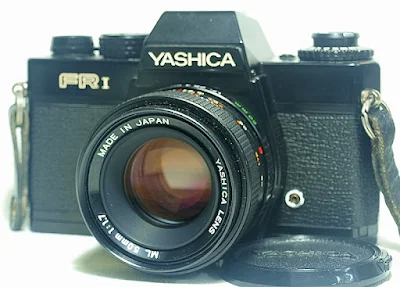
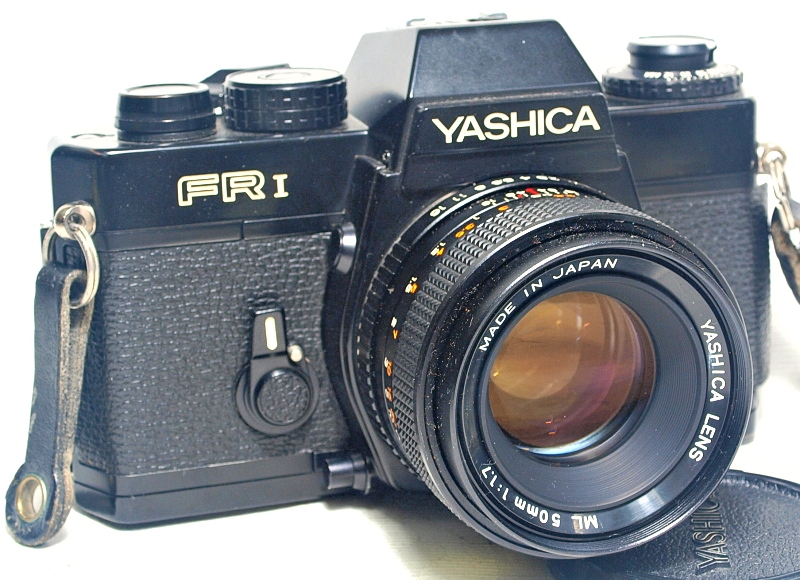
Sporting a simple, clean-lined rectangular front, the front plane of the FR I is only occupied by the self-timer system switch located towards the lower left of the lens mount housing, the lens mount housing itself, and the X-sync terminal socket to the lower right of the former. The self-timer system is a combination of two lever switches, the bigger self-timer lever itself, and a smaller self-timer start lever.
Located on the left vertical of the lens mount are the lens release button and the Depth-of-Field (DoF) preview button, the former located towards the top of the mount, while the latter is right at the lower extreme.
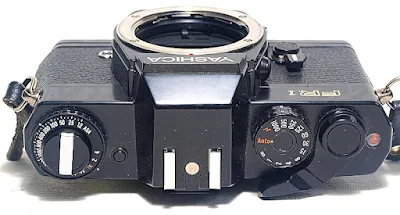
The top plane of the FR I is equally uncluttered. On the extreme left are the integrated Film Rewind Crank, the pull-up and twist film ISO setting ring, and the turn-to-adjust Exposure Compensation dial, with the push-down Battery Check Button located next to it. The pentaprism hump, which supports the Accessory Shoe, is a bit of bulk and is located slightly off-center to the left of the top plane.
To the right of the pentaprism hump is the Shutter Control dial, and next to it is the Shutter Release button, which shares the same axis with the Film Advance Crank. Right to the end of the top plane is the Exposure Counter and Battery Check Lamp.
On the back of the top plate of the camera is the viewfinder eyepiece, located back to the pentaprism hump, with the press-and-slide Exposure Check Button, and Remote Cable Release Socket next to it. The lower part of the backplane is occupied by the hinged film back, which is also fitted with a memo Tab Holder. The film back is interchangeable with the Data Back.
On the bottom plane of the camera are the Motor Drive Coupling Terminal, Tripod Socket, Motor Drive Coupling, Film Rewind Release Button, and Battery Chamber Cover.
The film box is a standard film-load system as seen on most 35mm SLR film cameras of the era, with the standard film canister chamber located on the left, and the shutter window, film advance sprocket gear, and the multi-slot take-up spool mechanism arranged to the right.
Film Loading and Rewinding
Make sure that the film is properly tensioned across the opening and that the perforations on the film edge are properly aligned with the sprocket gear before closing the back. Do the standard 2-blank shots after closing the film back to forward the film to frame 1, and you are ready to go.
To rewind and unload, press the rewind release button on the camera baseplate and crank the film rewind lever clockwise until the film roll is fully rewound into the film canister. Open the film back, and remove the film roll for processing.
Viewfinder Readout
The display is enhanced with a horizontal lens aperture opening scale on the top of the screen, and a shutter speed scale with a needle pointer system to the right.
The lens aperture slide is marked for lens opening from f1.2 to f32, while the shutter speed scale is for stepped speed setting from 1 to 1/1000 second, with red over- and underexposure marks above and below the shutter speed indicator marks.
An 'M' flag is displayed on the lower-right corner of the screen when the camera is set to Metered Manual.
Exposure Check Control
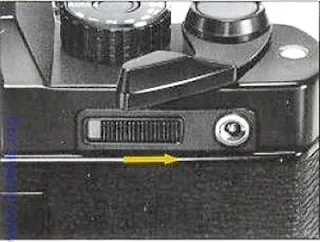
For a quick display, the meter is activated by pressing the Exposure Check button located just below the film forward crank.
For a continuous reading, first pull out the film crank lever slightly outward until it feels constrained. Next, slide the Exposure Check button outward until it locks in place. Reverse the action to release the lock and deactivate the meter.
Exposure Modes
With the Yashica FR I, you can use the FR I to shoot either in automatic exposure or fully metered manual modes. In automatic exposure mode, the shutter speed is steplessly controlled by the electromagnetic shutter release system.
The camera will set the shutter speed steplessly from 1 to 1/1000 seconds, with no display accorded to you unless you have the metering display activated.
Metered Manual Exposure - To get the correct exposure setting in metered-manual mode, first set the shutter to the speed you want to work with. Next, set the metering display to continuous mode, frame and focus the image, and adjust the lens aperture opening to match the shutter speed needle pointer in the viewfinder to the speed selected on the shutter speed dial. Release the shutter.
Self-Timer Mode
The 7-second delay self-timer, which works independently from the shutter release system, is engaged when the self-timer lever is rotated outward to the 90-degree mark and is activated when the self-timer start lever is moved likewise.
To get the system to function completely, make sure that the film is forwarded properly before the self-timer system is engaged and activated.
Multiple Exposure Mode
The multiple exposure mode on the FR I is a fairly advanced feature of the camera, where all you have to do is press the Film Rewind Release button while using the Film Forward Crank the same way as you would crank the film forward.
Please note that the frame counter will continue to advance each time you make multiple exposures. This will result in you having more frames left at the end of the film roll than what is shown on the frame counter.
Battery Check
The Yashica FR I has a battery check feature that doubles as the frame counter illuminator, located on the top right end of the camera body. The Battery Check is activated by a push-button located midway between the Film Rewind Crank and the base of the pentaprism hump on the top plate of the camera. The illuminator window will light up if the battery has enough power to operate the camera.
Camera Body Weight and Battery
The camera body weight of the FR I is 660 grams body only.
A 4LR44 6-volt battery is required to power the camera electronics. The camera will not function without a battery.








Bardzo kompetentny opis. Dzięki.
ReplyDeleteThank you.
Delete