 |
What is Unsharp Mask
Contrary to what you were thinking when you first came across the term, an 'unsharp mask' is a tool used to sharpen an image.
 |
| Intermediate edit with Art Filter, Contrast, and Saturation |
It is most probably the most common type of sharpening and is available as well on Olympus Viewer 3 (OV3) for the sharpening of both JPEG and *.orf RAW image files.
 |
| *.orf RAW image file as uploaded |
Technically, the process works by utilizing a slightly blurred version of the original image, which is then subtracted from the original to detect the presence of edges. Contrast is then selectively increased along these edges using this mask, leaving behind a sharper final image.
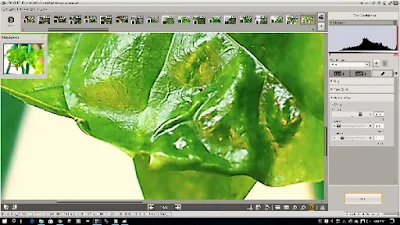
The three images above (shown in reverse) show the 3-stage process that I adapted to my workflow. Briefly, Stage 1 is to get the image uploaded and opened in RAW Development Mode on OV3, Stage 2 covers all edits necessary, including Crop, before applying the Unsharp Mask in Stage 3, which may take a while due to the inherent slowness of OV3.
When to Use Unsharp Mask
Sharpening should also be the last step of the editing process. Do this after you have completed all other functions, which may include Art Filter application, Exposure Compensation, White Balance setting, Highlight & Shadow Control, Contrast, Saturation, Crop, and Tone Control adjustments.
It is also pertinent that you do the Unsharp Mask adjustments in 1:1 view or at least 50% magnification. Doing it in other magnifications may end up with images having anti-aliasing weirdness.
In RAW Development Mode on OV3, I do this by simply following the function/feature list on each of the three menu sets displayed - RAW 1 (Basic 1), RAW 2 (Basic 2), and Edit. Go down the list of the menu items and pick the one you want to use before moving to the next menu block. You will end up in the Edit block, where Unsharp Mask is the last item listed.
Function Variables
Digital unsharp masking is typically controlled by Amount, Radius, and Threshold settings. In OV3, they are displayed as slider controls on the function menu:
- Amount - Controls how much darker and how much lighter the edge borders become. The value is adjustable between 0 to +500, listed as a percentage.
- Radius - Controls the size of the edges to be enhanced or how wide the edge rims become. A small radius enhances smaller-scale detail, while high radius values can cause halos at edges. The value is adjustable between 0 to +250 pixels.
- Threshold - Controls the minimum brightness change that will be sharpened or how far apart adjacent tonal values have to be before the filter does anything. The value is adjustable between 0 to +100 pixels.
 |
| *.orf RAW image file as uploaded |
Worked Example
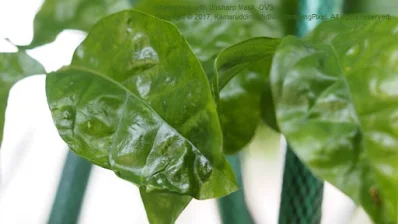
Let us go through a worked example here, another image of one of my garden plants. The image was in *. ORF RAW file, uploaded and opened in RAW Development Mode on OV3.
 |
| Intermediate edit with Art Filter, Contrast, and Saturation |
Stage 2 development was done with the following adjustments:/p>
- Art Filter: Pop Art
- Contrast: +2
- Saturation: +2
And for Unsharp Mask, work was done at 1:1 with the following function values.
 |
| Unsharp Mask edit at 1:1 |
- Amount: 400%
- Radius 4.0
- Threshold: 15
The Final Image
 |
| Final edit with Unsharp Mask |
Going forward
You can use my values here as a start to your own image-sharpening process using the Unsharp Mask. Treat this as a starting point, and you’ll want to push the values around until it looks right to you.
Try even starting with Amount: 85%, Radius=1.0, and Threshold: 4, and see where you will get from there. These are figures quoted for an all-purpose sharpening I picked off the Internet.


No comments:
New comments are not allowed.