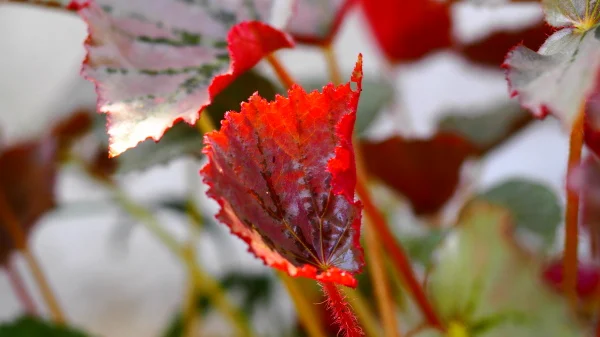
The Pop Art filter, one of the filters in the Art Filters pack of Olympus Viewer 3 (OV3), can be used beyond just as an Art Filter effect, one that acts as a catalyst for a fast-track development of suitable *.orf RAW image files. When activated, the Pop Art filter creates a brighter and more vivid rendition of the image with a range of super-saturated colors with enhancements and changes to Auto Tone Correction, Hue and Saturation, and Brightness and Contrast settings.
The Fast-Track Path
Fast-track this to the development of an image, that is by using the Pop Art filter effect as the first stage of development. Add in a couple more editing tools, and you will have a fairly competent post-processed image in about half or even one-third of the time you would have spent doing the edits individually. Compare that to the original image (on the right here) as shot in *.orf RAW and uploaded to OV3.
 |
| *.orf RAW file as uploaded to OV3 |
Workflow
Let's have a look at how his development was applied to a sample image, finished as the masthead image above. The image was developed in RAW Development Mode with the following four (4) step edits:
- Pop Art Filter Effect
- Contrast
- Saturation, and
- Unsharp Mask.
Fair warning, though, there is no guarantee that the method will work on all your images, maybe a couple from the set you are working on, or none at all. For other images, you might also need to edit Exposure Compensation, Highlight & Shadow Control, and maybe a couple of others.
Step 1 - Accessing The RAW Development Window
 |
| Image as opened in the RAW Development window |
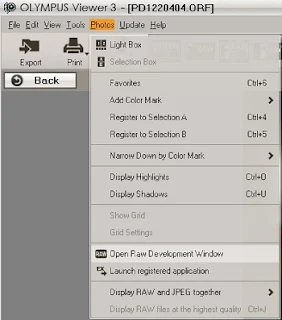
The image will be loaded first into the Image Edit Window of OV3. To access the RAW Development Window, pick the 'Photos' tab from the Menu Bar at the top left corner of the Image View window, scroll down, and select 'Open RAW Development Window'.
 |
| RAW Development Window menu select |
Note:
The image was originally shot in the 16:9 aspect ratio on the E-P5. The image framing was embedded into the RAW file, and cropping was automatically executed when the image was opened in the RAW Development mode.
Step 2 - Apply Pop Art Filter Effect
 |
| Image after application of the Pop Art filter effect |
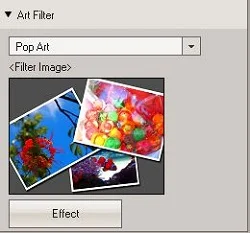
Select Art Filter from the RAW 1 development menu on the right of the screen and choose Pop Art. Art Filters are pre-fixed edits that add various creative effects to your images.
 |
| Pop Art filter menu select |
Pop Art effect supersaturates the colors of the image, applying auto tone correction, increasing hue and saturation, and enhancing brightness and contrast to create a more vivid image, all done in one step, automatically.
Step 3 - Apply Contrast Adjustment
 |
| Image after application of Contrast adjustment |
Go down the menu list and select Contrast.
 |
| Contrast adjustment menu select |
Contrast controls the range between lightness and darkness in the processed image. By using a “plus” setting, the brightness range is shortened, and the image will have a more vivid appearance with more brilliant colors.
For this image, Contrast was set to +2.
Step 4 - Apply Saturation Adjustment
 |
| Image after application of Saturation adjustment |
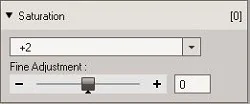
Go down the menu list and select Saturation.
 |
| Contrast adjustment menu select |
Saturation allows you to set the level of color vividness. A “plus” value, such as plus 2, will make the colors more vibrant. A “minus” value, such as minus 2, will make the colors flatter.
For this image, Saturation was set to +2.
Step 5 - Apply Unsharp Mask Edit
 |
| Image after application of Unsharp Mask edit |
Move over to the Edit menu and select the Unsharp Mask.
 |
| Unsharp Mask edit setting |
Unsharp Mask is the most common type of tool used for the sharpening of both JPEG and *.orf RAW image files. The tool is available in OV3 as well. The process works by creating a slightly blurred version of the original image, which is then subtracted from the original to detect the presence of edges.
Contrast is selectively increased along the edges of the image, leaving behind a sharper final version.
For this image, the values are set to:/p>
- Amount at +400
- Radius at +4.0
- Threshold at +4.0
And you are done! Time to export the image.
Note:
Once applied, the Art Filter effect is fixed. For changes that you want to be done to the image, adjusted down, or de-toned if necessary, you do so by using negative values with other applicable edit tools. For example, if the image is suddenly too bright and looks overexposed after applying the Pop Art filter effect, you can tone down the overall exposure by editing Exposure Compensation to a negative value or using the Highlight & Shadow Control tool to adjust the overall brightness of the image.


No comments:
New comments are not allowed.