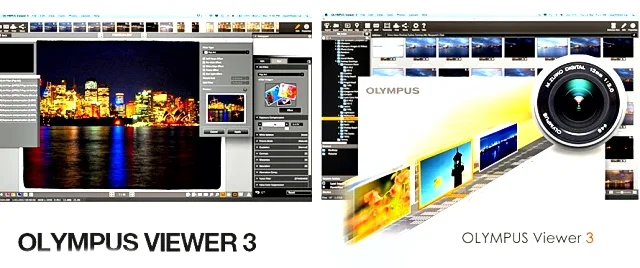
Olympus Viewer 3 (OV3), the digital image editing and management software from Olympus, is the basic software suite you can use to import images and movies taken with your digital cameras to view, edit, and manage them.
The software is part of the CD package that comes with the current purchase Olympus digital camera and it can be used to edit and manage both Olympus RAW (.OCR) and other generic JPEF image files.
For viewing, editing, and printing purposes, Olympus Viewer 3 software allows you to quickly find and arrange the images from albums or folders by photo type or timeline.
You can go about doing these tasks from two management modes, an easy-to-use 'Library management mode' for entry-level users, and the 'Folder mode' for the more adventurous one, which also includes extensions to the RAW editor interfaces.
Olympus Viewer 3 automatically detects faces in the photos. You can filter photos so that only those with specific people are displayed. You can also change registered names as desired.
 |
| The software is part of the CD package that comes with the current purchase Olympus digital camera. |
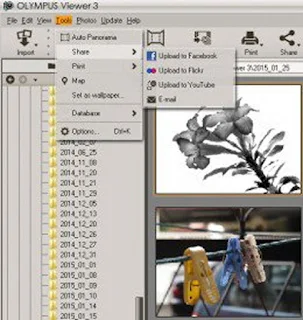
On the social networking front, Olympus Viewer 3 supports Facebook, Flickr, YouTube, and sending as email attachments. If you use the camera to preset the upload reservation function, uploading is even easier.
The app can also assist your workflow when selecting the best shot from a large number of images using color marks, and the selection and lightboxes. It is also available for free download from the net.
Where to Download Olympus Viewer 3
Installation
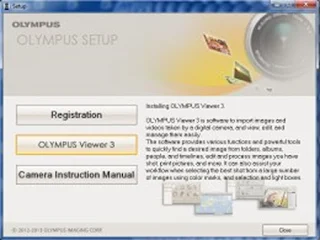
Installing Olympus Viewer 3 is straightforward, place the CD that comes with your digital camera package in your CD drive, set it to Auto-run, click on the 'I Agree' buttons when asked for and you can choose to 'Register' your digital camera product, install 'Olympus Viewer 3' and download the 'Camera Instruction Manual' as well.When completed, the installation will default the display to the 'Library Management' mode and is now ready for you to start importing image and video files from your digital camera, or from a 'Specified Location', which can be a pen-drive, hard disk, or other media.
A more advanced image management mode available on the Olympus Viewer 3 is the 'Folder management' mode.
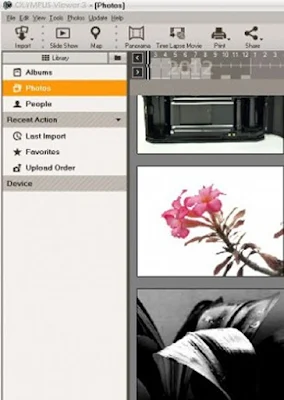
'Library Management' Mode
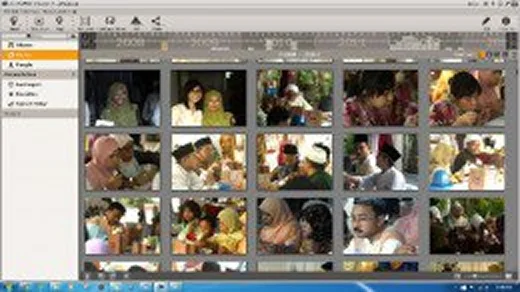
In 'Library Management' mode, images and videos are imported and are located in albums that are automatically created for each shooting date, which you can specify as ascending or descending. This is a good way to learn image management, if you are new to the system, or if you have a large collection of images and videos. These are displayed in an index by each year they were shot.
Work with the menu listing on the top left corner of the interface and you can also choose to display images and videos by timeline display.
An automatic search for people (faces) is also performed on the imported images to classify photos. If you add the name of a family member or friend on the 'People' display, you will be able to view a photo collection specifically relating to them.
'Folder Management' Mode
The 'Folder Management' mode eliminates the need to organize images into categories yourself because it automatically creates a subfolder, ordered by the date you import images from your camera. Use the slider control located in the lower right corner of the display to adjust the size and number of images displayed on your monitor.
Additionally, you can create shortcuts to those folders you use often, and add favorite marks to images to display just your favorite images from multiple folders.
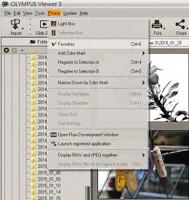 Marking Favorites
Mark your images as 'Favorites' while you are in the 'Folder management' mode. Click on the image you want to mark as a favorite or use the 'Shift key+Pick button' combination to pick more than one image,Next, pick 'Photo' from the main menu bar on the top of your screen, and pick 'Favorite' from the drop-down list.
Access to view these images from the Favorites menu listing when you are back in Library management mode.
Exporting Images
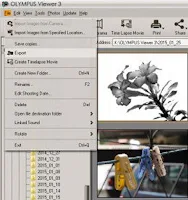
Picking images for export is just as easy. Pick the images from the 'Folder management' mode, and once done, pick 'File' from the top menu, and choose the 'Export' option.The next step, however, is slightly different. You will be prompted with a dialog box offering you a series of choices and options for the exported images.
The basic setup includes:
- Identify your target export location. Choose from the drop-down list if you already have several folders created previously. Click the tick box below the image display area to record the target as one of your choices. Use the folder icon to set a new export destination if you are just starting out.
- Naming the image you are exporting.
- Specifying your image export format - choose from Exif.JPEG (which will carry over the Exif data from your image), plain JPEG, Exif.TIFF, plain TIFF, or Bitmap.
- Specifying on the JPEG compression quality - High, Standard, or Low if you are exporting JPEG files or 8 or 16 Bits/channel TIFF files.
- Specify if you want the image re-sized, and the maximum image size to be exported size, in pixels, specified.
Time-Lapse Movies
The Time-Lapse Movie function is a fast and snappy method of creating a movie presentation from a series of single digital images.Group select a range of images while in the 'Folder Management' mode and pick the 'Time-Lapse Movie' icon on the menu ribbon located on top of the image display section.
You will be presented with the 'Create Template Movie' dialog box where you can display settings parameters. This includes inserting Shooting Time, Frame Size and Frame Rate setting, File Name, and save location. The export format is currently set to MotionJPEG.AVI.
Social Networking
You can upload your images to Facebook and Flickr, and your videos to YouTube through the normal authentication process.Log in to your account, or do signup for new accounts on Facebook or Flickr from inside the dialog box.
For Facebook, you have the option to create a new album, with a description, or use an existing album, and to set your privacy setting to Only Friends, Friends of Friends, or Everyone.
For Flickr accounts, you can create a new set, set the Privacy setting to Private or Public, and specify the image size.
For e-mail communication, you can retain the original size of the image, or Resize & Convert images to Mobile Phones (640x640 pixels), Smartphones (1280x1280 pixels), TV (1920x1920 pixels), Small (800x800 pixels), Medium (1024x1024 pixels), or Large (1600x1600 pixels).
Printing Outputs
Printed output from Olympus Viewer 3 can be in three forms:
- A photo print - is a print of a single image on print media. You adjust the layout to fit the paper size, specify the print size, print date, and name, or do borderless prints if your printers permit this.
- An index print - a printed and bound copy with header/footer notes containing a specified number of thumbnail images of digital photos and may with corresponding file names and shooting dates as stored on your computer.
- A contact print - a printed copy of a series of images from a collection, used to fine-tune the images for selection or post-production. Images can be printed with a specified number of images on specified frame shapes (portrait, rectangular or square), font type, and other information.
What's Next?
An item not yet covered in this Beginners Guide to Olympus Viewer 3 is a chapter on mapping GPS log information. This I will add to this hub shortly.Beyond the basics are the editing and image manipulation functions of Olympus Viewer 3 which is quite extensive in itself, and may need a hub of its own. I will work on that too. Thanks.









No comments:
New comments are not allowed.